The Arduino IDE 2 is the successor to the classic IDE with improved performance and a revised user interface. The IDE 2.0 has functions for auto-completion, integrated debugger and synchronization of sketches with the Arduino Cloud on board.
In this article we deal with the installation of the Arduino IDE 2.0.
Download the IDE:
You can download the software from the official Arduino website at https://www.arduino.cc/en/software. Search for the appropriate download for your system.

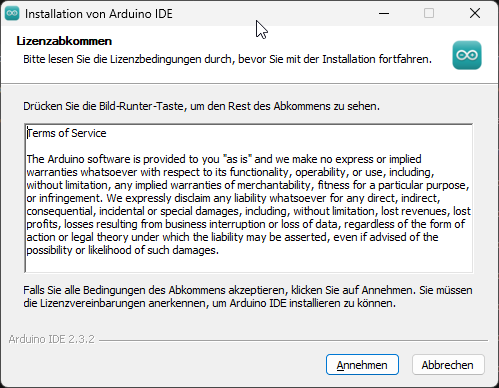
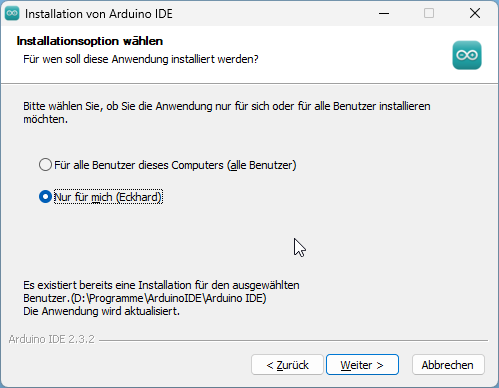
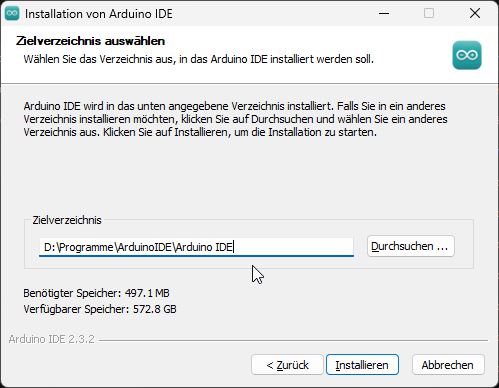
Find the file arduino-ide_2.3.2_Windows_64bit.exe in your download folder and start it. This will start the installation process. Go through the following steps.
The installation process then starts. The first time it is opened, Arduino AVR boards, the built-in libraries and other files are installed. Under certain circumstances, security settings may also appear asking for permission to install device drivers. Please allow this.
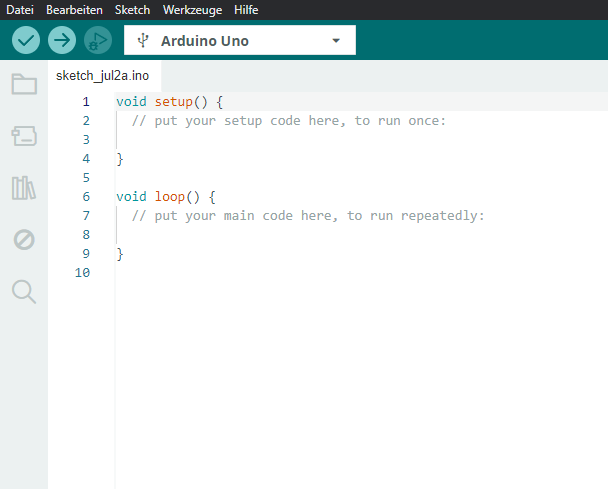
In the center you can see the code structure that the IDE presents to you when you create a new sketch.
On the left you can see some icons:
- Sketchbook
- Boardmanager
- Librarymanager
- Debugging
- Search
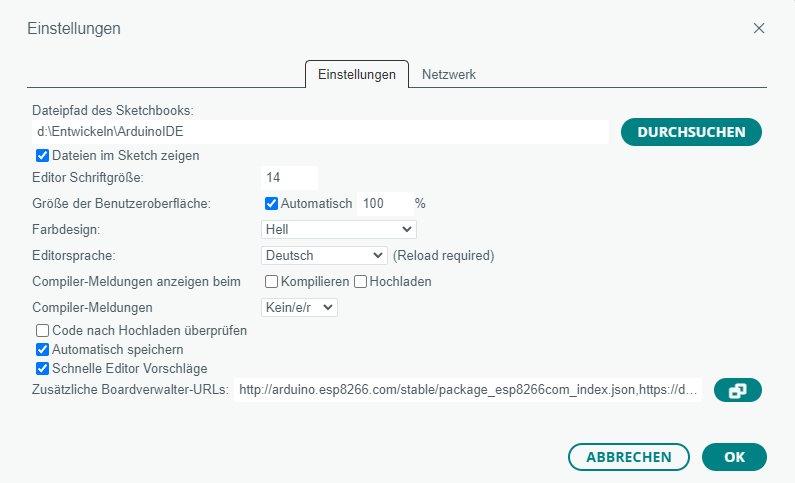
The adjacent window opens under File->Settings.
Please specify the file path of the sketchbook here. (Where should your developed programs be located in the future?)
You can switch on automatic code completion under “Quick editor suggestions”.
The framed symbol opens the next view.
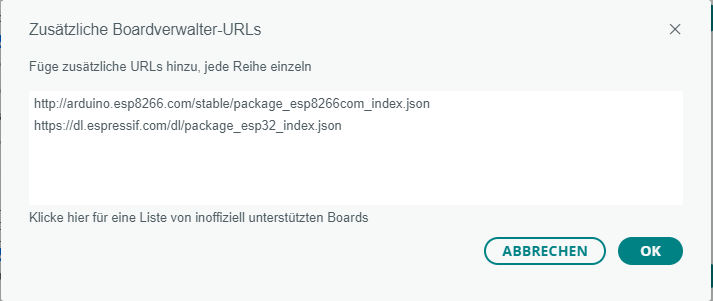
Please enter the addresses below and confirm the installation with OK.
Please enter the following addresses under “Additional board administrator URLs”:
https://dl.espressif.com/dl/package_esp32_index.json
http://arduino.esp8266.com/stable/package_esp8266com_index.json
This also ensures that you can use ESP32 or ESP8266 boards.
This should enable you to install the Arduino IDE smoothly and gain your first experience of using the IDE.
In the first paragraph on this page, I have included the official links from Arduino.cc to the individual functions. Here you will find further information on the individual areas.

