Introduction
- The aim of this article is to create a database with phpMyAdmin after installing xampp.
- We will have to do three things. Create database, create data table, create table fields.
- I have tried to present the actions step by step.
1. Setting up a local development environment
- Installation of XAMPP:
If you haven’t already done so, please take a look at the article.
XAMPP: Your local development environment for web projects
Here I explain the installation of xampp in detail and carry out a first test with the localhost .
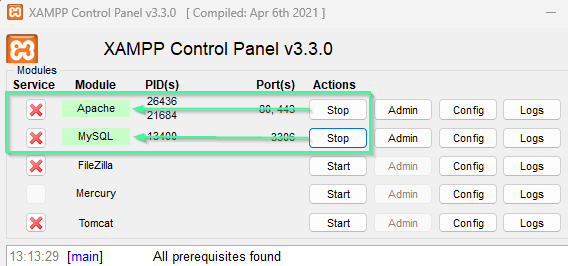
- Start Apache and MySQL:
- Instructions for starting the required services in the XAMPP Control Panel. As already explained in the article “XAMPP: Your local development environment for web projects”, start xampp-control.exe from the installation path (with admin rights if necessary).
2. Creation of a local database
- Access to phpMyAdmin:
- please enter the following url in your browser – http://localhost/phpmyadmin This will take you directly to phpMyAdmin and you can start creating your database with table and fields.
- Create a new database:
- Instructions for creating a new database (e.g. sensor data).
Please click on “NEW” to start.
The dialog for creating a new database opens. Please fill in the “Database name” field, e.g. with “sensor data”. Then click on “Create”.
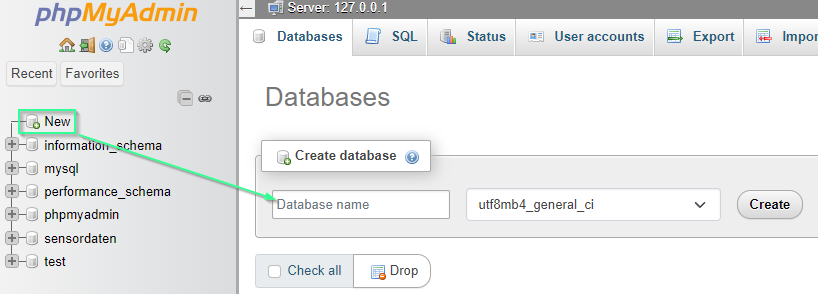
Once the database has been created, you will also see your new database on the left in the image below. The next step continues immediately.
The creation of a table. As shown here, fill the table name field with e.g. “SHT31_daten” and the number of columns with 4. then click on “Create”.
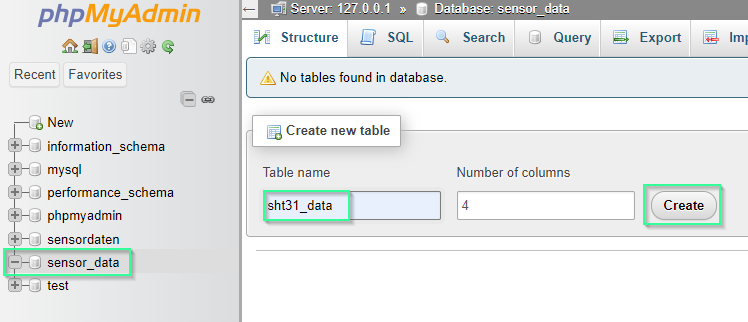
Now we have already created a database and a table within the database. The only thing missing are the data fields within the table, which we now want to do. We had created 4 columns.
- id – is a consecutive id for each written data record. id should increment automatically. Note the blue checkbox in the Auto increment column on the right.
- temperature – records the measured values for the temperature. Type is varchar(6). 6 characters can be stored.
- humitity – records the measured values for humidity. Also of type varchar(6).
- date – Timestamp of the written data record. Type = timestamp, default = current time, always write attributes when a new data record comes in.
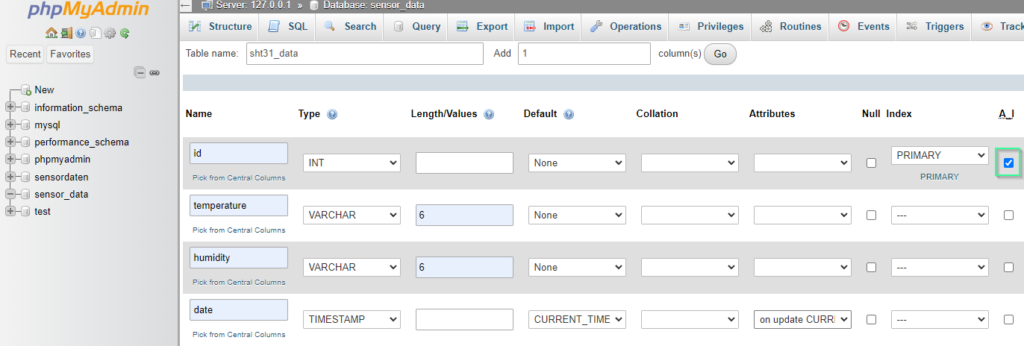
This is the structure of the created table.

For those who are more experienced here, the structure can also be created in the database using SQL commands.
CREATE TABLE sht31_dada (
    id INT AUTO_INCREMENT PRIMARY KEY,
    temperature VARCHAR(6) NOT NULL,
    humidity VARCHAR(6) NOT NULL,
    timestamp TIMESTAMP DEFAULT CURRENT_TIMESTAMP
);
A click on Ads shows us the result of our efforts. However, there are no values here yet. This should change quickly.
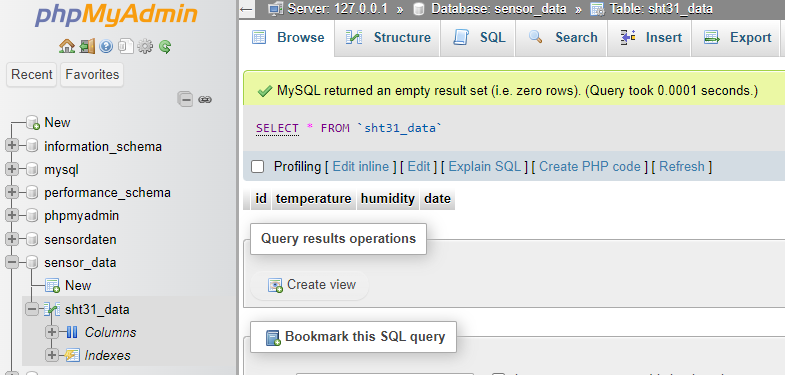
We test the database once with a sample value.
To do this, please click on SQL and enter the following in the field Execute SQL command in table sht32_data and then click on OK below.
INSERT INTO sht31_data (temperature, humidity) VALUES ('22.5', '55.2');
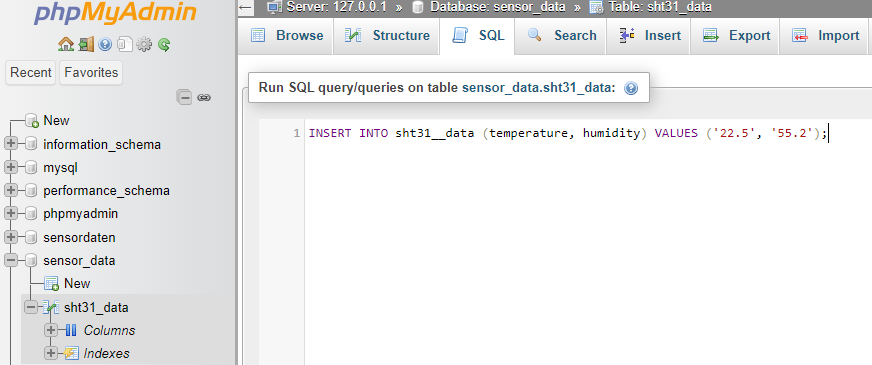
If you were able to execute the command successfully, please click on “Show” and you will see the result below. Our sample values have been added to the database.

In this DIYTechAdventure, I showed you how you can use a web server with your local installation and develop your projects without an internet connection and possible server fees.
In the next post, I’ll show you how to use your knowledge from the post “XAMPP: Your local development environment for web projects” and this article “Saving sensor data on a local web server” for a project directly on the microcontroller.
