ESP32 Webserver zur Steuerung eines Shelly Relais mit dem Smartphone
In this adventure, “Smartphone Controls Shelly,” the goal is to use the ESP32 microcontroller as a web server to control a Shelly relay. A simple web page is created to allow turning the heating on or off. This project is aimed at hobbyists and beginners who want to learn how to connect the ESP32 to a Wi-Fi network, use HTTP requests, and create an interactive web interface.
Task
The task is called Smartphone Controls Shelly. First, it’s necessary to connect the ESP32 to the Shelly AP. Using a web server running on the ESP32, we should be able to turn the heating on or off via smartphone or computer. The goal is to enable control through a simple web interface with two buttons (“On” and “Off”). Additionally, we should display the current status message from Shelly directly on the web page.
Project Components
The project’s source code is divided into several main parts:
Establishing a Wi-Fi Connection
First, the ESP32 connects to the Shelly’s Wi-Fi network. We use the function begin_wlan_client(), where the SSID and password are defined. The connection status is displayed on the serial console, allowing us to check if the connection was successful.
How to establish a Wi-Fi connection is explained in detail in this article.
HTTP Requests to Shelly
The function http_Post_Request() sends an HTTP GET request to the Shelly relay to turn it on or off. Depending on the requested URL (“/relay/0?turn=on” or “/relay/0?turn=off”), the relay is toggled. The response is output to the serial console, allowing us to check Shelly’s status.
In this article, I’ve explained the code for HTTP requests in detail.
Turning Heating On and Off
The two functions heizung_ein() and heizung_aus() directly control the relay and return a status message indicating if the action was successful. Here, the payload of the HTTP response is analyzed to ensure that Shelly has executed the command correctly.
Setting Up the Web Server
The web server is started in the setup() function. Through the web server, we can enable control over the local network. The web server provides several endpoints, such as “/” (home page), “/ein” (turn heating on), and “/aus” (turn heating off).
Web Interface for Control
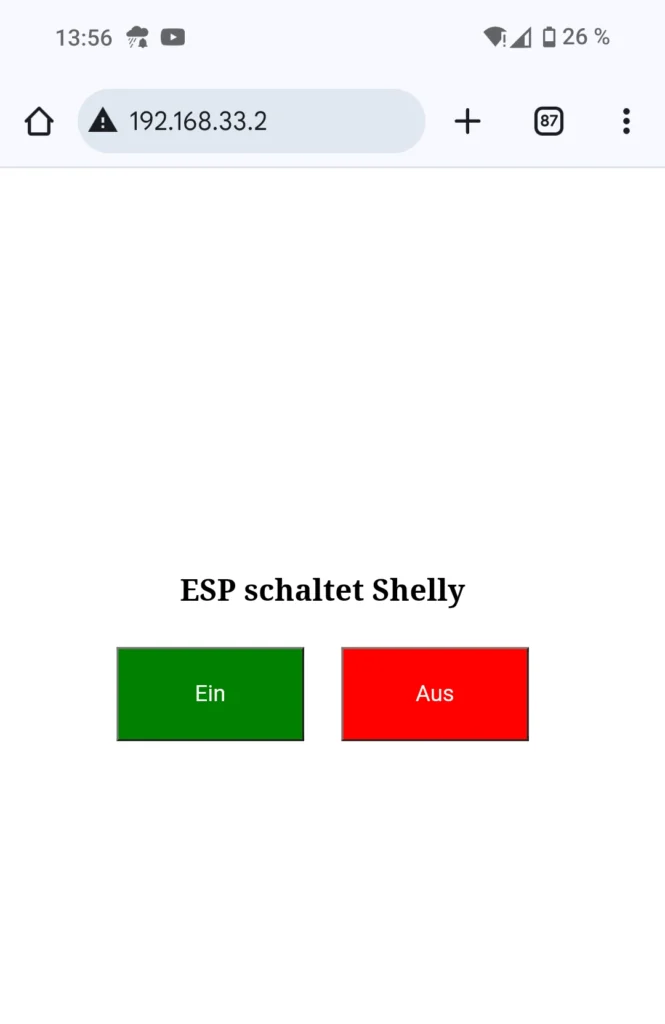
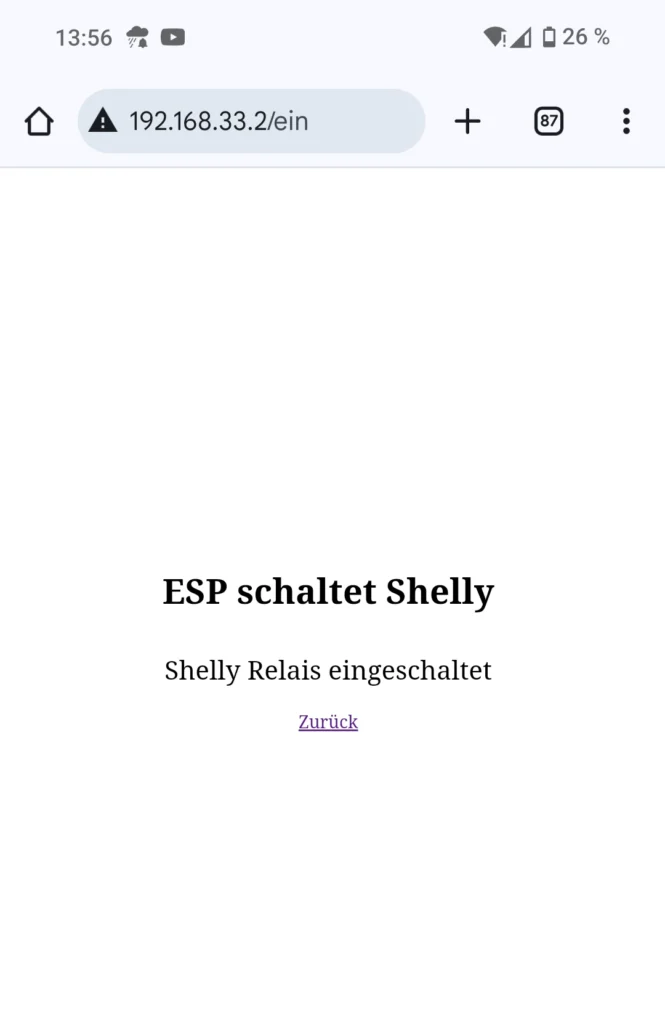
The function handle_root() creates a simple HTML web page. This page includes a heading and two buttons for turning the heating on and off. The buttons are larger and centered to make them easy to use on mobile devices. The feedback from Shelly (whether the heating is on or off) is also displayed in the center of the page so that the user immediately sees the result of their action.
// Integrate required libraries
#include <Arduino.h>
#include <WiFi.h>
#include <HTTPClient.h>
#include <WebServer.h>
//Set the WIFI name and password of the Shelly AP
const char ssid[] = "shelly1-12BA14";
const char password[] = "shellyAP";
const char schalter_on[] = "http://192.168.33.1/relay/0?turn=on";
const char schalter_off[] = "http://192.168.33.1/relay/0?turn=off";
WebServer server(80);
// Insert function declarations here:
void begin_wlan_client();
String http_Post_Request(const char* url);
void heizung_ein();
void heizung_aus();
void handle_root();
void handle_heizung_ein();
void handle_heizung_aus();
void setup() {
begin_wlan_client(); // Start WLAN connection
// Define web server endpoints
server.on("/", handle_root);
server.on("/ein", handle_heizung_ein);
server.on("/aus", handle_heizung_aus);
server.begin();
Serial.println("Webserver gestartet.");
}
void loop() {
server.handleClient();
}
// Insert function definitions here:
void begin_wlan_client() {
WiFi.begin(ssid, password);
Serial.begin(115200); // For debugging in the console
Serial.println("Establishing a connection to the WLAN...");
// Waits until the ESP32 is connected to the Shelly WLAN
while (WiFi.status() != WL_CONNECTED) {
delay(500);
Serial.print(".");
}
Serial.println("");
Serial.print("Connected withIP: ");
Serial.println(WiFi.localIP());
}
String http_Post_Request(const char* url) {
HTTPClient http;
http.begin(url); // Start the HTTP connection
int httpResponseCode = http.GET(); // Send HTTP GET request
String payload = ""; // Empty payload for the response
if (httpResponseCode > 0) {
payload = http.getString(); //Receive response as string and output to serial
Serial.print("Answer: ");
Serial.println(payload);
} else {
Serial.print("Error during request, error code: ");
Serial.println(httpResponseCode);
}
http.end(); // Terminate the HTTP connection
return payload;
}
void heizung_ein() { // Function to switch on the heating
Serial.println("Switch on the heating...");
String payload = http_Post_Request(schalter_on);
int pos = payload.indexOf(':'); // Search for the first ':', e.g.{"ison":true,
int pos2 = payload.indexOf(',');
String result = payload.substring(pos + 1, pos2);
Serial.print("Answer from Shelly: ");
Serial.println(result);
if (result == "true") {
Serial.println("Heating successfully switched on!");
Serial.println();
} else {
Serial.println("Error when switching on the heating.");
Serial.println();
}
}
void heizung_aus() { // Function for switching off the heating
Serial.println("Switch off the heating...");
String payload = http_Post_Request(schalter_off);
int pos = payload.indexOf(':');
int pos2 = payload.indexOf(',');
String result = payload.substring(pos + 1, pos2);
Serial.print("Answer from Shelly: ");
Serial.println(result);
if (result == "false") {
Serial.println("Heating successfully switched off!");
Serial.println();
} else {
Serial.println("Error when switching off the heating.");
Serial.println();
}
}
void handle_root() {
String html = "<html><body style='text-align: center; display: flex; flex-direction: column; justify-content: center; height: 100vh;'>";
html += "<div style='margin-top: 10%;'>";
html += "<h1 style='text-align: center;'>ESP schaltet Shelly</h1>";
html += "<button style='font-size: 24px; width: 200px; height: 100px; background-color: green; color: white; margin: 20px;' onclick=\"location.href='/ein'\">Ein</button>";
html += "<button style='font-size: 24px; width: 200px; height: 100px; background-color: red; color: white; margin: 20px;' onclick=\"location.href='/aus'\">Aus</button>";
html += "<p id='status' style='font-size: 24px; margin-top: 40px;'></p>";
html += "</div>";
html += "</body></html>";
server.send(200, "text/html", html);
}
void handle_heizung_ein() {
heizung_ein();
server.send(200, "text/html", "<html><body style='text-align: center; display: flex; flex-direction: column; justify-content: center; height: 100vh;'><div style='margin-top: 10%;'><h1>ESP schaltet Shelly</h1><p style='font-size: 24px; margin-top: 40px;'>Shelly Relais eingeschaltet</p><a href='/'>Zurück</a></div></body></html>");
}
void handle_heizung_aus() {
heizung_aus();
server.send(200, "text/html", "<html><body style='text-align: center; display: flex; flex-direction: column; justify-content: center; height: 100vh;'><div style='margin-top: 10%;'><h1>ESP schaltet Shelly</h1><p style='font-size: 24px; margin-top: 40px;'>Shelly Relais ist ausgeschaltet</p><a href='/'>Zurück</a></div></body></html>");
}
// Erforderliche Bibliotheken einbinden
#include <Arduino.h>
#include <WiFi.h>
#include <HTTPClient.h>
#include <WebServer.h>
const char ssid[] = "xxxxx"; //dein WLAN Name
const char password[] = "xxxxxxxxxxxxx"; // dein WLAN Passwort
const char shelly_ip[] = "192.xxx.x.xxx"; // Beispiel IP-Adresse des Shelly im Heimnetzwerk
String schalter_on = "/relay/0?turn=on";
String schalter_off = "/relay/0?turn=off";
WebServer server(80);
// put function declarations here:
void begin_wlan_client();
String http_Post_Request(const String& url);
void heizung_ein();
void heizung_aus();
void handle_root();
void handle_heizung_ein();
void handle_heizung_aus();
void setup() {
begin_wlan_client(); // WLAN-Verbindung starten
// Webserver-Endpunkte definieren
server.on("/", handle_root);
server.on("/ein", handle_heizung_ein);
server.on("/aus", handle_heizung_aus);
server.begin();
Serial.println("Webserver gestartet.");
}
void loop() {
server.handleClient();
}
// put function definitions here:
void begin_wlan_client() {
WiFi.begin(ssid, password);
Serial.begin(115200); // Zum Debuggen in der Konsole
Serial.println("Verbindung zum WLAN herstellen...");
// Wartet, bis der ESP32 mit dem Heim-WLAN verbunden ist
while (WiFi.status() != WL_CONNECTED) {
delay(500);
Serial.print(".");
}
Serial.println("");
Serial.print("Verbunden mit IP: ");
Serial.println(WiFi.localIP());
}
String http_Post_Request(const String& url) {
HTTPClient http;
String fullUrl = "http://" + String(shelly_ip) + url;
http.begin(fullUrl); // Starte die HTTP-Verbindung
int httpResponseCode = http.GET(); // Sende HTTP GET-Anfrage
String payload = ""; // Leeres Payload für die Antwort
if (httpResponseCode > 0) {
payload = http.getString(); // Erhalte Antwort als String
Serial.print("Antwort: ");
Serial.println(payload);
} else {
Serial.print("Fehler bei der Anfrage, Fehlercode: ");
Serial.println(httpResponseCode);
}
http.end(); // Beende die HTTP-Verbindung
return payload;
}
void heizung_ein() { // Funktion zum Einschalten der Heizung
Serial.println("Schalte Heizung ein...");
String payload = http_Post_Request(schalter_on);
int pos = payload.indexOf(':'); // Erstes ':' suchen, z.B. {"ison":true,
int pos2 = payload.indexOf(',');
String result = payload.substring(pos + 1, pos2);
Serial.print("Antwort vom Shelly: ");
Serial.println(result);
if (result == "true") {
Serial.println("Heizung erfolgreich eingeschaltet!");
Serial.println();
} else {
Serial.println("Fehler beim Einschalten der Heizung.");
Serial.println();
}
}
void heizung_aus() { // Funktion zum Ausschalten der Heizung
Serial.println("Schalte Heizung aus...");
String payload = http_Post_Request(schalter_off);
int pos = payload.indexOf(':');
int pos2 = payload.indexOf(',');
String result = payload.substring(pos + 1, pos2);
Serial.print("Antwort vom Shelly: ");
Serial.println(result);
if (result == "false") {
Serial.println("Heizung erfolgreich ausgeschaltet!");
Serial.println();
} else {
Serial.println("Fehler beim Ausschalten der Heizung.");
Serial.println();
}
}
void handle_root() {
String html = "<html><body style='text-align: center; display: flex; flex-direction: column; justify-content: center; height: 100vh;'>";
html += "<div style='margin-top: 10%;'>";
html += "<h1 style='text-align: center;'>ESP schaltet Shelly</h1>";
html += "<button style='font-size: 24px; width: 200px; height: 100px; background-color: green; color: white; margin: 20px;' onclick=\"location.href='/ein'\">Ein</button>";
html += "<button style='font-size: 24px; width: 200px; height: 100px; background-color: red; color: white; margin: 20px;' onclick=\"location.href='/aus'\">Aus</button>";
html += "<p id='status' style='font-size: 24px; margin-top: 40px;'></p>";
html += "</div>";
html += "</body></html>";
server.send(200, "text/html", html);
}
void handle_heizung_ein() {
heizung_ein();
server.send(200, "text/html", "<html><body style='text-align: center; display: flex; flex-direction: column; justify-content: center; height: 100vh;'><div style='margin-top: 10%;'><h1>ESP schaltet Shelly</h1><p style='font-size: 24px; margin-top: 40px;'>Shelly Relais eingeschaltet</p><a href='/'>Zurück</a></div></body></html>");
}
void handle_heizung_aus() {
heizung_aus();
server.send(200, "text/html", "<html><body style='text-align: center; display: flex; flex-direction: column; justify-content: center; height: 100vh;'><div style='margin-top: 10%;'><h1>ESP schaltet Shelly</h1><p style='font-size: 24px; margin-top: 40px;'>Shelly Relais ist ausgeschaltet</p><a href='/'>Zurück</a></div></body></html>");
}
I have shown the code above twice. Left tab -> Shelly is running as an access point / right tab -> Shelly is logged into the home WLAN.
For testing the Shelly AP, please note: the smartphone must be logged into the Shelly Access Point at 192.168.33.1. See the article here for comparison!
As shown in the output of the serial interface, the ESP32 connects to Shelly at the IP address 192.168.33.2. This IP address should also be entered as the URL in your smartphone’s browser. It should look like this for you as well.


For testing when Shelly is logged into the home Wi-Fi, you need the IP address of the ESP32, which you can find in the output of the serial monitor.
Connected with IP: 192.xxx.x.xxx
Turning heating on…
Response: {“ison”,”has_timer”,”timer_started”:0,”timer_duration”:3600,”timer_remaining”:3600,”source”:”http”}
Response from Shelly: true
Heating successfully turned on!
On your smartphone, enter this IP address to access the web interface of your web server on the ESP32.
Result
The result is an ESP32-based web server that provides a simple and intuitive web interface to control the Shelly relay. Users can access the ESP32’s web page with their smartphone or computer on the same network and turn the heating on or off by pressing the corresponding buttons. Additionally, Shelly returns a status message, which is also displayed on the webpage.
This project serves as an excellent introduction to using the ESP32 to control smart home devices. It teaches how to establish Wi-Fi connections, send HTTP requests, and create a simple web server with HTML. For beginners, this project offers a comprehensive overview of the basics of IoT programming and demonstrates how to develop a user-friendly interface for controlling devices.
Have fun building and experimenting!
